Setting up and removing Windows 10 programs.
This guide for novice users will detail where Windows 10 programs are installed and removed, the fastest way to get to this Control Panel component, and additional information on how to properly remove Windows 10 programs and applications from your computer.
In the new OS, in addition to the control panel, a new “Settings” application is used to change settings, which can be launched by clicking “Start” - “Settings”. Among other things, it allows you to remove programs installed on your computer.
To uninstall a Windows 10 program or app using Settings, follow these steps:

As you can see, the new version of the interface for removing Windows 10 programs from your computer is quite simple, convenient and efficient.
3 ways to remove Windows 10 programs - video
The fastest way to open Programs and Features
Well, the promised new quick way to open the uninstall programs section in the “Applications and Features” of Windows 10 settings. There are even two such methods, the first opens the section in the settings, and the second either immediately starts uninstalling the program or opens the “Programs and Features” section in the Control Panel :

Additional Information
Many installed programs create their own folder in the “All Applications” section of the Start menu, which, in addition to the shortcut to launch, also contains a shortcut to uninstall the program. You can also usually find the uninstall.exe file (sometimes the name may be slightly different, for example, uninst.exe, etc.) in the folder with the program; it is this file that starts the uninstallation.

To remove an app from the Windows 10 Store, you can simply right-click on it in the Start menu app list or on its tile on the Start screen and select Uninstall.
With the removal of some programs, such as antiviruses, there can sometimes be problems when using standard tools and you need to use special removal utilities from official sites (see). Also, to more completely clean the computer when uninstalling, many use special utilities - uninstallers, which you can read about in the article.
And lastly: it may turn out that the program that you want to remove in Windows 10 is simply not in the list of applications, but it is on the computer. This could mean the following:
- This is a portable program, i.e. it does not require installation on your computer and simply starts without a preliminary installation process, and you can delete it as a regular file.
- This is a malicious or unwanted program. If you have such a suspicion, refer to the material.
I hope the material will be useful to novice users. And if you have any questions, ask them in the comments, I will try to answer.
Windows 10, in terms of managing the installation/removal of programs, is, in principle, not much different from previous builds, but there are still some nuances: for example, an updated uninstaller tool has been added, which now launches with lightning speed through “Add or Remove Programs.”
...however, questions immediately arise: where is the installation and removal of Windows 10 programs? what is the fastest way to get into this control panel component.?. and, of course, the most important question that worries the minds of dozens of users is how to properly remove Windows 10 programs so that everything is clean and error-free after the uninstallation has completed (when the program is removed).
Let's look at it... and explain it side by side:
Text by points:
Where is the Add/Remove Programs section in Windows 10?
notes for:
in Windows 10, as in other systems, there is a built-in “search” for Windows components on the taskbar - in order to find any tool in the rich list of dozens, simply type the name of the required element in the search field. If the name is entered correctly, then in 99% of cases it will be found. All you have to do is click on the link you found and go where you need to go...
You should also be aware of the fact that most programs installed on your computer create their own folder in “All Applications” - in this folder there is a shortcut that is moved to the Windows desktop to quickly launch the program, and also in this folder along with the shortcut there is a so-called file uninstallation type uninstall.exe - if you click on this file, the uninstallation process will start - that is, the removal of a specific program!
However, if working with files is still a difficult task for you, then let’s consider the standard variations of removing installed programs in the system:
In Windows 10, the “Add or Remove Programs” tool itself must be looked for in “Programs and Features” - that is, this tool remains in its usual previous place of management as in previous systems.
...and you can open it in the following simple way:
In the search - on the taskbar - type the phrase “Control Panel”, the system will immediately display the result - all we have to do is select the required item.
But there is a nuance here: pay attention to the “View” settings item (circled in brown) - if, for example, you, like me, have the option to display the “Categories” control panel set, then in the “Programs” option select “Uninstall a program”.
...if “Icons” is set, then in this case we select “Programs and Features”...

We desperately click on the required items...
...in the program and component settings item, everything is simple: to remove some program that is unnecessary for you and me - 1 - find it in the list... press the right mouse button and click on “Delete”, or you can quickly click on the top section of the menu , as shown in the screenshot below, Delete/edit...

If you uninstall the program, a warning window will open - you agree to the removal.
The automatic removal process will start...
uninstalling programs through Settings in Windows 10
In the updated top ten, you can change system parameters using the built-in “Settings” tool of the same name. To get to the parameters, click “Start” and, accordingly, “Settings”. In these very parameters, just like in the components... it is possible to easily remove programs installed on the computer.

how to quickly open Programs and Features - the easiest way
How to quickly open the uninstall programs section?
It’s simple: open it in “Applications and Features” of Windows 10 - I’ll give you a couple of ways:
Let's grab the mouse - right button - click on the "Start" button (I will report: it is possible to use Windows hotkeys - in this case the so-called combination WinIX - Win + X -
Many users are wondering how to completely remove an application from their computer? The problem was especially acute for people who upgraded from the usual version of the system to Windows 10, since the new version changed the navigation and the method of uninstalling programs. In this article we will tell you how to produce uninstalling programs in Windows 10 effortlessly in several convenient ways.
How to remove a program in Windows 10 via Start?
Windows 10 introduces one of the easiest ways to uninstall software - using the Start menu. Thanks to this, the process speeds up several times. For this you will need:
- Open the Start menu by clicking on the Windows logo in the lower left corner.
- Select the one you need from the list of installed products or use the search for a simplified search.
- Select the desired product from the list and right-click on it. Select “Delete” from the drop-down menu.

This will open a control panel with a list of all installed products. Depending on the version of the operating system, the uninstaller will either launch automatically or you will have to turn it on manually. Once started, a window will open where, using step-by-step instructions, the cleaning process from a personal computer will take place.
In some cases, the program will be uninstalled immediately without the appearance of the control panel. This most often occurs when uninstalling products that were installed using the Microsoft Store.
Uninstalling programs in Windows 10 using Control Panel
This method is proven and universal for all versions of the Microsoft operating system. Its operating principles have not changed at all over all editions of the system, so it is familiar to almost everyone. In the latest versions, there are several ways to enter the panel with deleting and changing installed software. Now we will look at each of them in detail.

1 option
- Open the Start menu.
- In the search, enter the phrase “Add or remove programs.” You can write part of a phrase, the search will automatically display the most similar option, and it will be correct.
- Click on the item labeled “Add and Remove Programs.”
- A list of all installed programs will open. Click on the name, and then on the “Delete” button.
Option 2
- Open the Start menu at the bottom right of the screen.
- Click on the gear icon to open settings.
- In the menu that opens, select “Applications”.
- By default, the "Applications and Features" section will open. We repeat the steps from paragraph 4 of option 1.

Option 3
- Go to “Start” and enter “Control Panel” in the search. From the list, select the classic control panel application.
- Click on the “Programs” item.
- In the menu that opens, select “Programs and Features”. After which the standard menu for uninstalling installed products will open.

Uninstall using PowerShell
This option is most suitable for advanced computer users or programmers and system administrators. PowerShell is a system tool that developers have provided to remove some pre-installed applications and components. For example, photos or text documents that are standard for viewing cannot be uninstalled in the usual ways.

The basic principle is to create a console command that will find the required component and clean it up. The problem with this method is that you can mistakenly remove an important component for the system, which will disrupt its operation.
- In the search, enter “PowerShell” and run as administrator.
- The console application will open. Enter the command Get-AppxPackage | Select Name, PackageFullName to see the list of installed components.
- Next, enter Get-AppxPackage program_name | Remove-AppxPackage –package, where the name is taken from the list in the second paragraph.
Using Additional Tools
Many people wonder how to completely remove programs from Windows 10, because after uninstallation there are often temporary files or residual garbage that has not been cleaned up. This also applies to the system registry, cluttering of which can affect the performance of the computer.
Remove unnecessary Windows 10 programs with CCleaner
CCleaner is one of the oldest and well-known computer maintenance utilities. Using it, you can clean the registry, junk and residual files, change startup when you start your computer, and much more. Complete cleaning instructions:
- Click on the “Service” item.
- The uninstallation tab will immediately open. Select the desired application and click the “Delete” button.

How to Remove Programs from a Windows 10 Computer Using Revo Uninstaller
This utility is intended only to remove installed components, but in the process it clears all connections and notes in the computer’s registry. Instructions for use are as simple as possible:
- Let's launch Revo. Select the desired product from the list.
- Click the “Delete” button at the top of the window. After this, the cleaning process will begin.

If you still have questions on the topic “How to remove a program in Windows 10?”, you can ask them in the comments
The purpose of writing the proposed article with several instructions is to provide the novice user with information on how to correctly uninstall applications in Windows 10 using its means and through third-party applications. Along the way, the user will become familiar with methods for calling a tool designed to remove unnecessary programs from the system.
In general, a quick comparison of the procedures in Windows 7-8 and in the “ten” are similar, and there are actually no fundamental changes or innovations, besides the updated user interface. Is it worth noting the emergence of an accelerated method for calling the Control Panel applet, which is responsible for uninstalling software. Let's start with how to enter the interface for removing applications installed on the system.
How to find a tool responsible for uninstalling programs in Windows 10?
An applet or Control Panel element, which is a kind of application integrated into Explorer, called “Add or Remove Programs” is located in a place familiar from previous versions of the OS.
1. Call the Toolbar window, for example, through the new menu Win → X.
There are many ways to do this in the “top ten”; read about them in the corresponding article.
2. If the value of the “View” field is defined as “Category”, click “Uninstall programs” in the “Programs” section, otherwise we find the “Programs/components” element.

This way we will get access to the applet, which contains a list of software products installed on the computer with the ability to uninstall them or fix problems (for example, one of the software components was accidentally deleted).

You can get rid of any component located in the list of installed applications. Their number will be slightly larger than the number of shortcuts you can find in Start. Removing programs is carried out by sending the corresponding command by clicking on its icon. This is done both using the “Delete/Change” button in the toolbar, and through the context menu of the selected element. After this, the system will launch the uninstaller included in the application distribution, giving the user the opportunity to specify uninstallation parameters (for example, leave the utility settings).

You can also access the applet through an improved search, which does an excellent job.

New interface for uninstalling applications in the Settings menu
Settings was developed as a replacement for the Control Panel, but it was not possible to quickly convert users who were accustomed to it, so the Settings menu remains an alternative to the Control Panel. It has its own tool for uninstalling applications from Windows 10. Let’s look at how to get to the uninstallation interface through Settings in more detail.
1. Open the menu using the keyboard shortcut Win → I or through the Start context menu.
2. Go to the “System” section.
3. Click on the “Applications/Features” tab.

As a result, a list of programs detected in the system will be displayed. Their removal is carried out in the same way as the previous method: select the application, click “Delete” and confirm the action. Next, the integrated installer or Windows installer will launch, where you need to perform a couple of clicks.
As we see, there is nothing complicated or new in this method; it is also primitive in operation and regularly performs the assigned tasks.
Additional ways to open the software uninstall dialog in Windows 10
Now that we've looked at the classic method of opening the Programs/Features applet, it's time to familiarize yourself with a quick way to invoke this tool.
1. Call Win → X using the appropriate combination or right-click on Start.
2. Select the appropriate item from the drop-down list.

Also, the following option works for most programs: open Start, right-click on the unnecessary component (this only applies to third-party programs) and select “Delete”.

This way we will see a list of installed applications. With its help you can get rid of an unnecessary component of the system.
Related information
Most installed utilities create folders with shortcuts to launch the uninstaller (the application itself, Help, etc.) in the Start section of All Programs. Clicking on this shortcut will launch uninstall.exe or uninst.exe, located in the root folder with the application files.

You may experience problems uninstalling some applications. This applies, for example, to emulators that implement their own drivers into the system, antiviruses and peripheral device (video adapter) drivers. In many cases, you will simply have to restart Windows 10. If problems arise when removing antiviruses and video adapter drivers, you should use uninstallers developed for them.
To comprehensively clean the system from any application, you should pay attention to applications such as Revo Uninstaller and similar ones. The program will not only launch the built-in installer of the application, but will also offer to conduct a shallow or deep scan of the file system for files remaining from the operation of the remote utility and will find registry keys belonging to it.
If you do not find any product in the list of installed ones, this may mean that the program you are looking for is portable or the target software product is malicious. To get rid of it, you should use an antivirus or anti-spyware, for example, AVZ.
If you download any program or file from a browser or other program, by default, unless you change the download folder, all items are downloaded to the Downloads program. Apps you download through the Windows Store on Windows 10 or 8.1 are downloaded to a different folder.
In general, application data folders are located in a shared folder WindowsApps.
To find it, follow the path Local disk C:/ProgramFiles/.
You most likely will not see this folder in the general list, because... it is hidden. To do this, click on the tab at the top of the screen View, and check the box next to the item Hidden elements. After this, your folder should appear.

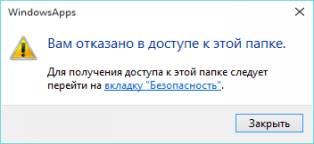
In addition, in most cases it is not possible to immediately enter the folder due to security settings. Therefore, it is necessary to edit them a little.
To do this, when the window appears You do not have permission to access this folder click on the button Continue, and when the window appears You are denied access to this folder, click on the link "Security" tab.

In the window that opens, select the tab Safety and click on the button Additionally.

Now in the window that opens Additional security options for WindowsApps click on the button Continue.


In the window that appears, in the field Enter the names of the selected objects you need to enter the name of the account to which you want to grant access, i.e. the one in which you are currently located, most often this is the name of the computer owner, “Administrators”, “Admin”, or the make and model of the computer and click on the Check names button. In this case, if the name is found, it will be displayed in underlined form and all you have to do is click on the button OK. If the name was entered incorrectly, you will get an error that the name was not found and the operation will not work.

If everything is in order, in the window we also click OK, and OK click in the window Properties. After that, go to the properties of this folder again, in the tab Safety, press again Additionally. In chapter Permission Elements Double-click on your account name.
Now, in the window that opens, check the box next to the item Full access And Apply these permissions to objects and containers only within that container and press OK.

In the window Windows Apps Advanced Security Settings and then in the window Windows Apps Properties also click OK.
Now you can try to open this folder again. In some cases, you may see the window appear again You do not have permission to access this folder, then just click on the button Continue, the second error should not appear this time.
Now you will see a list of folders in which standard Windows 10 applications are installed.